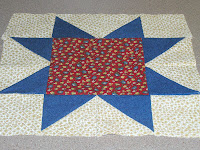
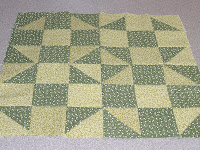
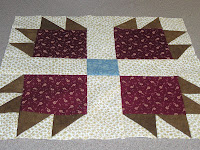
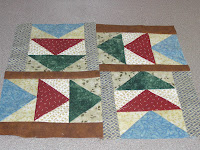
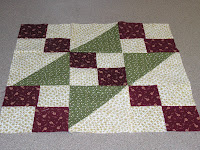
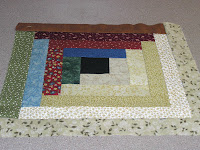
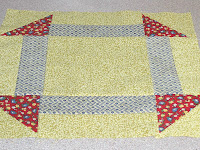
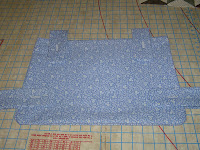
My daughter and I finished the Underground Railroad blocks this weekend. We only made 9 and they weren't difficult... it just seems that there has been no time or desire to sew lately. Following an unexpected death in the family, came an abscessed wisdom tooth which brought pain and then drugs! LOL! But life is working its way back to some sense of normalcy and so the sewing machine hummed again this weekend!
Sunday, October 28, 2007
Sweet Memories Preserved
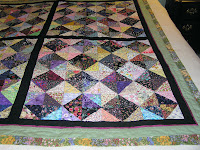 It seems I haven't blogged forever! The past 5 weeks have been surreal at times. On September 22, we were awakened to one of those phone calls you never want to get. My mother-in-law had died in her sleep. She was 79. Her passing was completely unexpected, as she was not ill with cancer or anything like that. But her health had declined recently and we learned that God had appointed September 22, 2007 as the day she was to come home to Him.
Her 3 children were in the process of planning a wonderful celebration for her 80th birthday in December and her only son, my sweet hubby, had pieced a beautiful quilt top as a surprise for her. His mother loved flowers and had green fingers! Hubby has inherited her love of things that bloom and blossom, so it was only fitting that he create a special Flower Garden for his mom.
We had even added a label to the back and had everything ready for him to quilt it.. in fact, that was his project for that weekend.
With the turn of events, another label was added and this weekend he finally picked up the quilt and poured out his love for his mom as he quilted her garden. And while she never got to see it or use it, I know she would have loved it... and I know it will be a cherished family treasure for generations to come.
"Belle"
Friday, October 12, 2007
Walker Bag Tutorial
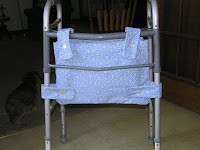
My mother is an extremely active 76 year old who has arthritis in her knees, but she doesn't let that slow her down! She has started walking... more like running!... with a walker. She called me last night and said "I need some way to carry things on my walker. Can you take one of those totes you make and redo the handles somehow to hang it on the walker?" So I did some net surfing.. looked at various walker bags... read the how-tos... tweaked this and that and created this:
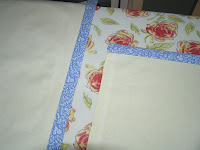
 I sewed around 3 sides of the tabs, leaving one short end open. Then I turned them wrong side out and ironed them flat.

In case anyone wants to make one, here is how I did it.
I used regular 100% cotton fabric for the bag and a heavier cotton for the lining. I am sure a blend would work also, but you definitely need a lining to add some weight and stiffness. I cut 2 pieces of the outer fabric and 2 pieces of lining... 14 1/2" x 18 1/2".
Then I cut fabric for the tabs (handles). I used the outer fabric and, again, lining. I wanted these to be sturdy. I thought of using webbing like I do in tote handles, but I knew I would be putting buttonholes in these and didn't think that would work with webbing. So I cut 4 pieces from the outer fabric and 4 from the lining for the tabs. The pieces were 6" x 10".

I place a piece of the outer fabric, wrong side up, on the ironing board. Then I topped it with a piece of the lining fabric, right side up. I folded the top of both down about 1/2" and ironed in place. Then I turned them down again and ironed. I did this for the front and back pieces of the bag. I then sewed them down to create a clean edge that won't fray.
For each of the 4 tabs, I placed a piece of lining fabric and outer fabric together with wrong sides touching. Then I folded them in half, lengthwise, so that the outer fabric was touching itself.
 I sewed around 3 sides of the tabs, leaving one short end open. Then I turned them wrong side out and ironed them flat.
Next I added button holes to each of the tabs. I put the side tabs about 1 1/2 in from the outer edge. I then added the side tabs to the front of one of the 2 fabric panels, pinning and then sewing in place. I also added the upper tabs. I sewed them to the back of the same panel, at the top, about 2 1/2" in from the outer edge. I used a box with an X in the center to secure the upper tabs.
Next I placed the 2 fabric panels with the right sides of the outer fabric together. The upper tabs are not effected as no sewing occurs on the top of the bag. The side panels are incorporated into the side seams. I made sure the tabs were facing into the bag between the panels, not sticking out. Pin the panels together and sew around the 2 sides and the bottom edges. I used a 1/2" seam allowance. Once sewn, I turned the bag right side out.
All that is left now is to add the buttons. I took the bag and, using safety pins, secured it to the walker. I then marked the placement of the buttons, removed the bag and sewed them on.
I feel certain I will make more of these and next time I will add some small pockets for keys, cell phone, sunglasses etc. These will be added to one side of the lining fabric before constructing the bag.
It took me a couple of hours to do this, but now that I have actually made one I think it can be done in about an hour. Not a difficult project at all.
"Belle"
Thursday, October 11, 2007
Headed Underground.....
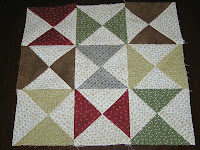
My daughter will be giving a presentation on the Underground Railroad later this semester in her American Lit class at college and for her Honors Forum. As part of her presentation, she is going to use the Underground Railroad Quilt. Now we both know (and have informed her professors) that there are those who believe that quilts really were used during the Underground RR and their are those who think it is a lot of "whooie." Even if it isn't true, the blocks can be used to represent various aspects of slavery and the UGRR and the quilt provides a wonderful teaching tool. SO we are making a small version using just 9 blocks. I made the first one last night. It is the Bow Tie block, which looks very different than the Bow Tie patterns I have seen. It was actually quite fun to make.... all Quarter Square Triangles! I think it turned out nicely. So one down.. 8 to go.. "Belle"
Tuesday, October 9, 2007
Real Men Quilt!
Monday, October 8, 2007
Busy Weekend
I haven't been able to do much sewing or quilting the last few weeks, do I was happy to get back into Sewing Central this weekend. I made 3 quillows... actually they are more like blillows.. blanket pillows. I didn't put batting in them nor did I quilt them. Mamaw Belle wanted a light weight blanket to take on the bus when she travels with her church group... and I decided to make some for a few of her friends. So I took a 60" length of flannel and a 60" length of cotton fabric... 1 WOF...I sewed a pocket on one side and then put them right sides together. Sewed all around leaving about an 8" opening. Turned it inside out and closed up the opening. Quick, easy and cute!
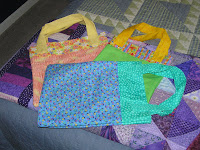
I also helped my dd make 3 more totes this weekend for the girls in her knitting class. She had more show up than planned! I think they turned out cute!
This shows the fabrics I used
for one of Mamaw Belle's friends:
And here is hers (pink)
and another friend's:
I also helped my dd make 3 more totes this weekend for the girls in her knitting class. She had more show up than planned! I think they turned out cute!
I also helped a special someone sandwich a quilt that was then quilted this weekend. I will post pictures and a bit about it soon!
"Belle"
Subscribe to:
Posts (Atom)
